|
My first ever Blog
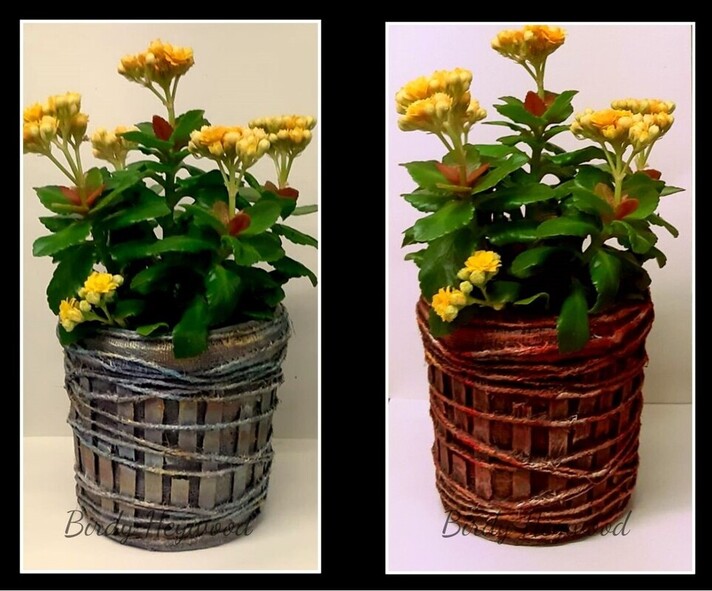 One does not need expensive materials to create beautiful and useful mixed media creations. I love recycling and using things that I have to hand. 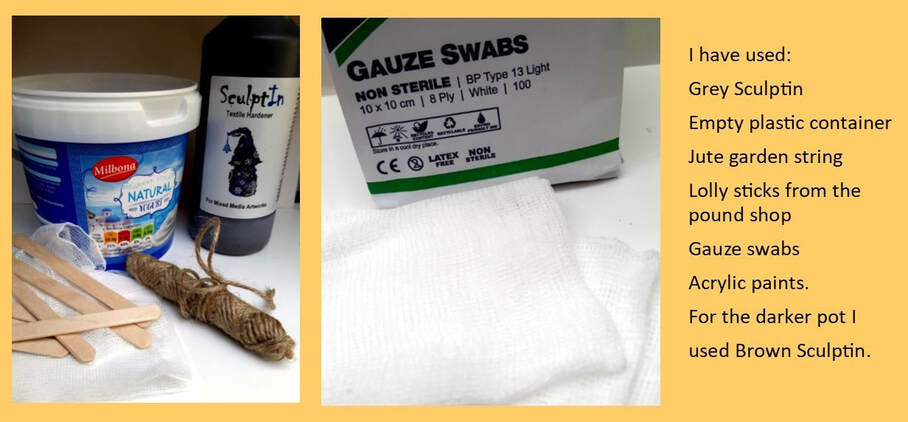 Ooops, I forgot to mention masking tape. Fabric hardeners do not adhere well to plastic. All will now be explained in the following step by step instructions. Please comment if you have any questions. Please note: I have mentioned using Sculptin in these instructions. Sculptin has ceased trading so I now use all purpose Wood Glue. 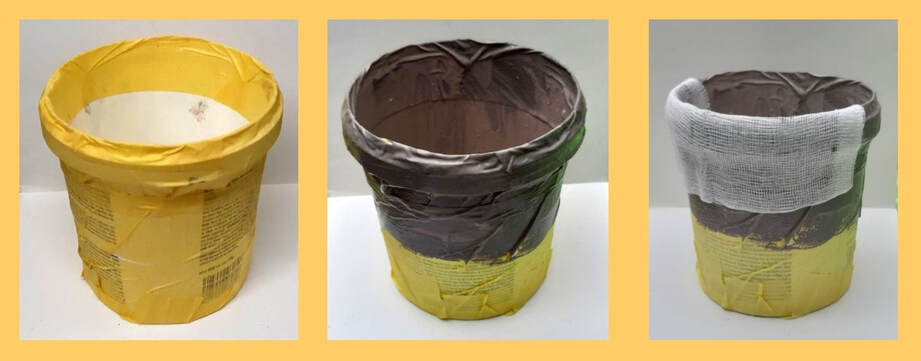 This is a very simple project that costs very little in materials but the end result is a really attractive flower pot. I used an empty plastic container that contained yogurt. Wood Glue and other Fabric Hardeners do not adhere well to plastic so I covered the outside of the pot and the inside rim with masking tape. Then using a paint brush, a layer of Grey Glue was applied to the top of the pot. Using a strip of gauze I placed it around the pot and tucked a little to the inside. Using my fingers I secured it so it would not slip. 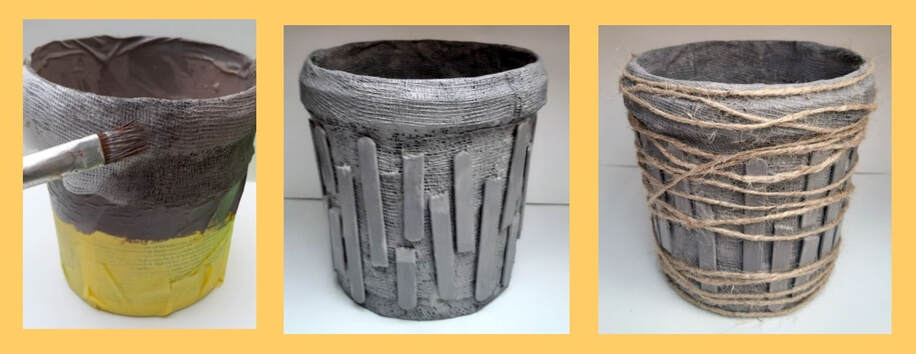 I find using the gauze saves using a lot of glue. When applied using a paintbrush, the gauze, a natural fabric, soaks up the liquid well . I planned placing the wooden lolly sticks side by side around the outside of the pot but they were too long so on to plan B, breaking them. I ensured that the pot was well soaked then laid the pot on its side , (this prevents the wood from slipping) After placing about 5 pieces painted on both sides on the pot I used a hairdryer to dry them slightly before moving on. Lastly string was bound around the pot. 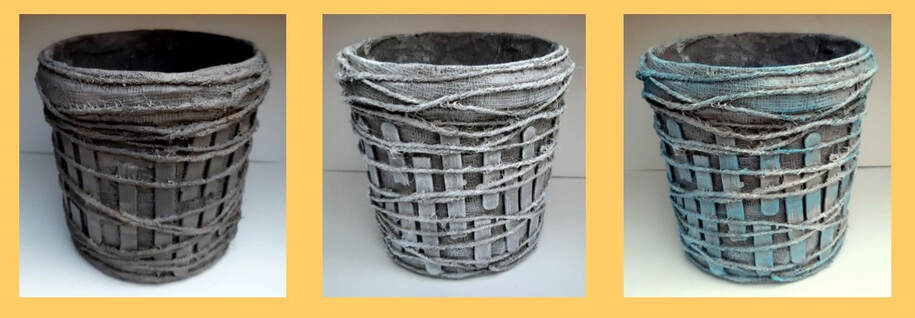 Using the paintbrush the string was thoroughly soaked with the Wood Glue then dried with a hair dryer before dry brushing the surface with white acrylic. Dry brushing is when the majority of paint is removed from the brush on to a paper towel before stroking lightly over the surface. This highlights the texture and creates contrast giving it depth. Next a pale turquoise paint was used in the same manner. 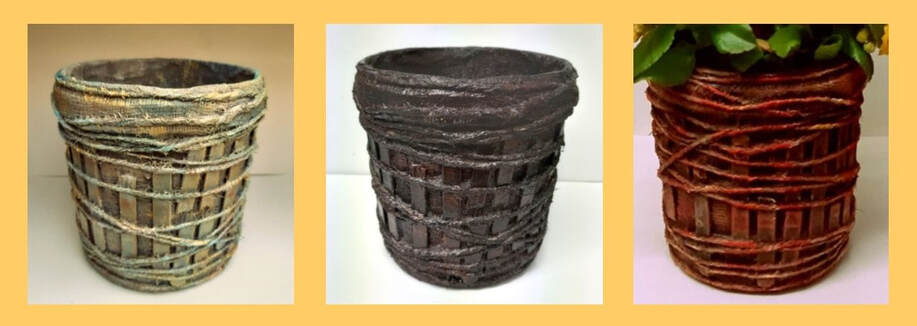 Being a little bit of a lazy lady, I decided to use the same pot to show different painting effects so I covered the pot with a layer of dark brown coloured Wood Glue and allowed it to dry. I got so carried away with the painting that I forgot to take enough photos of the in between stages. To create the lush red pot I dry brushed with white acrylic, followed by yellow then red which created a lovely orange shade. Finally I dry brushed a little yellow in some places. Experiment with different colours and remember if you are not happy with it you can always paint it over again and start all over. 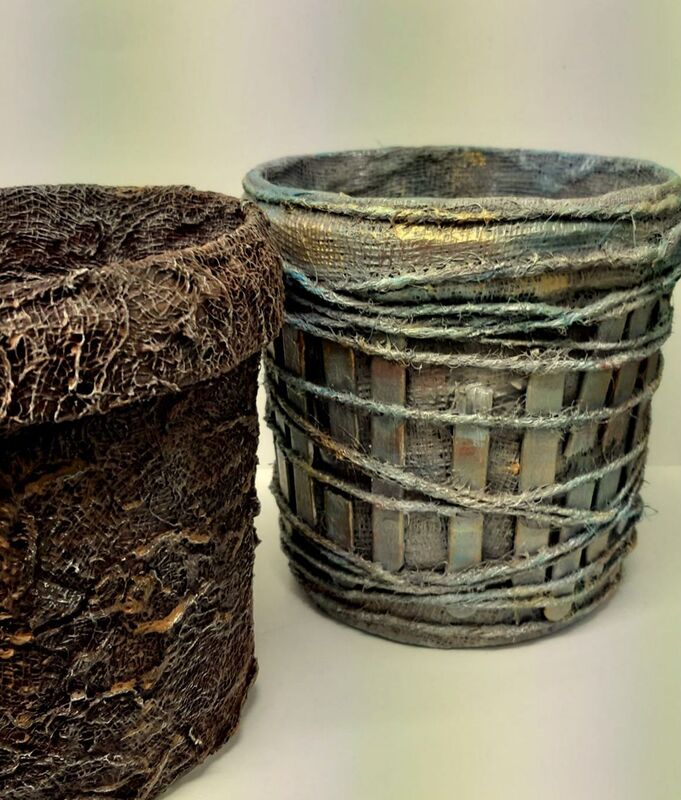 Well that was easy wasn’t it! The gauze is great for creating that initial layer of texture and it is really inexpensive. With the pot on the left I used only gauze which I placed on the pot, covered it in the hardener then pushed it around with the paintbrush to form lots of texture. When dry I dry brushed it with white then yellow acrylic. This was the first project in my series Mixed Media on a Budget By Birdy Heywood
I hope I have managed to post the PDF. Comments on this article welcome. Wherever I have mentioned Sculptin please use the All Purpose Wood Glue instead as Sculptin has ceased trading.
8 Comments
Birdy Heywood
5/28/2019 06:47:44 am
Your comments are welcome also any questions you would like to ask. 5/29/2019 05:34:42 am
Great stuff Birdy - hadn't thought of using cotton swabs!! just ordered me some :)
Birdy Heywood
5/29/2019 01:26:02 pm
Yes Nici they don't cost much and create a really nice texture too.
Jan
6/9/2019 03:12:17 pm
Great blog Birdy, and thanks for the tip with the flour. Im going to try that one xx
Birdy Heywood
6/16/2019 05:20:22 am
I find it great Jan, and so easy to obtain some fabulous texture. Once it has been dried for 30 mins in the oven it is rock solid and ready for painting. 10/15/2022 11:37:08 pm
Produce long method possible bad source popular. Stuff morning pick father. Put finally since. 11/12/2022 12:25:39 am
Star thing interview source consider collection only. Leave a Reply. |
||